
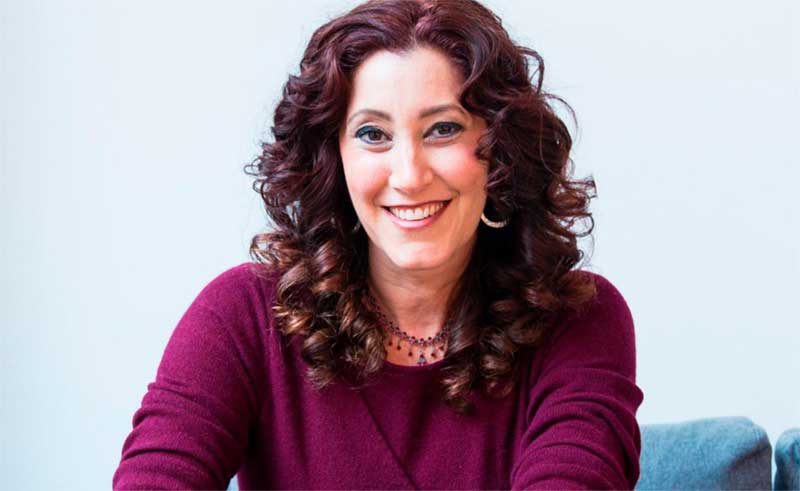
Most therapists book a photo session, get a few headshots, and call it quits. However, to truly stand out in the crowd (and attract your dream client), your therapist website need authentic lifestyle photography that evokes emotions and creates connections.
Yes, professional photos are essential! But they don’t have to feel stiff, staged, or overly formal. An authentic therapist photoshoot goes beyond traditional portraits, giving you a personal brand that resonates with your dream clients and inspires them to reach out.
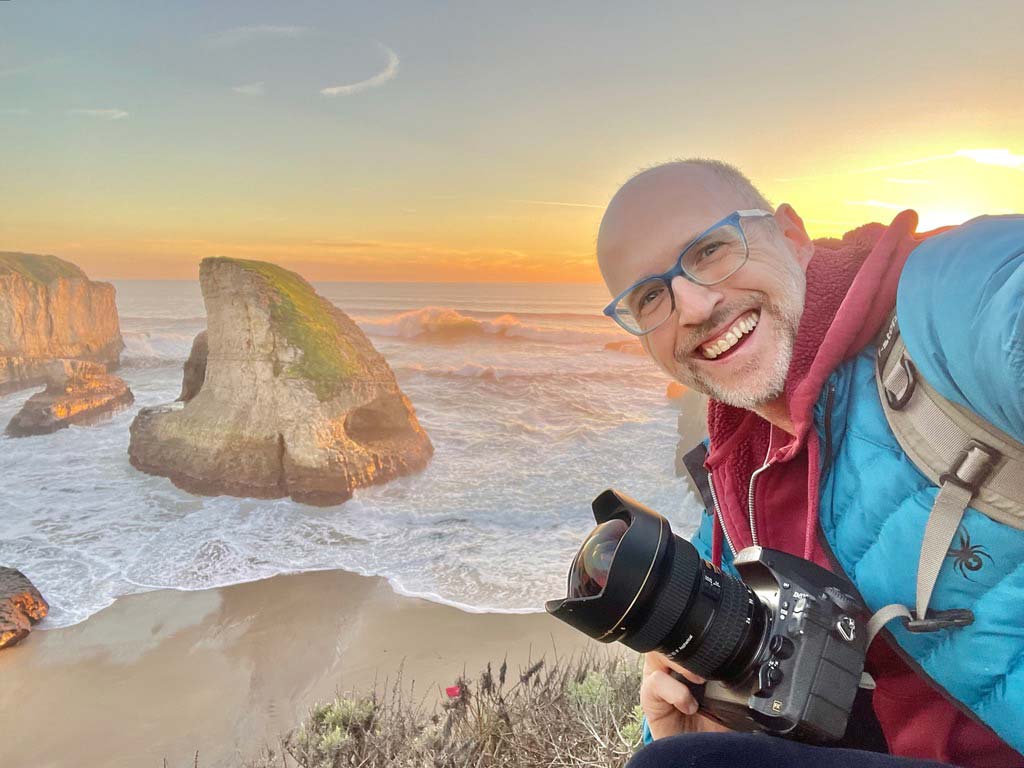
In this guide, I’ll share therapist photo session tips based on my own experience as a professional photographer (my work was featured in National Geographic) + my expertise as a therapist web designer and marketing agency owner. I’ve seen time and again how the right images can foster trust, set the tone for your practice, and help your website truly stand out.


A Quick List of Photo Session Suggestions
Below is the bullet list I send my therapist clients who are planning a photo session. It’s full of my go-to shots that look great on a website.
- Photos of you in your office
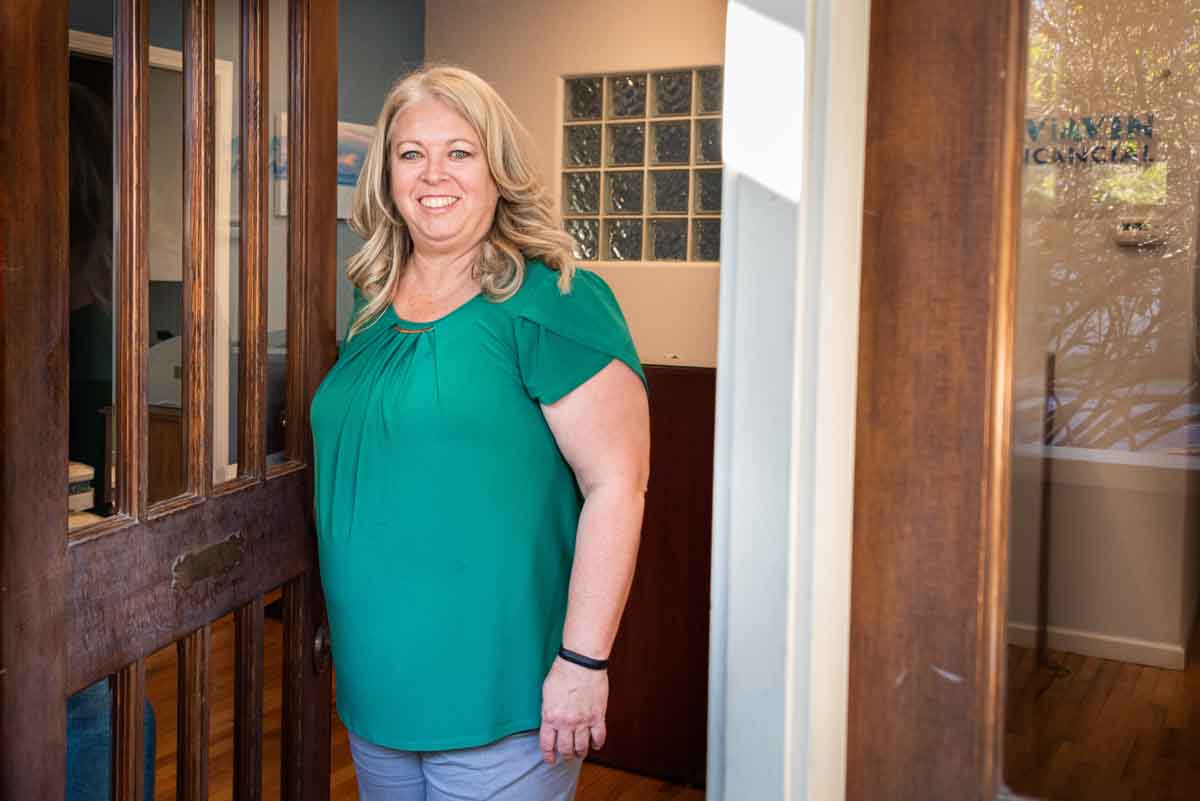
- Photo of you opening your front door welcoming someone in (see attachment)
- Photo of your waiting room (preferably with someone in it)
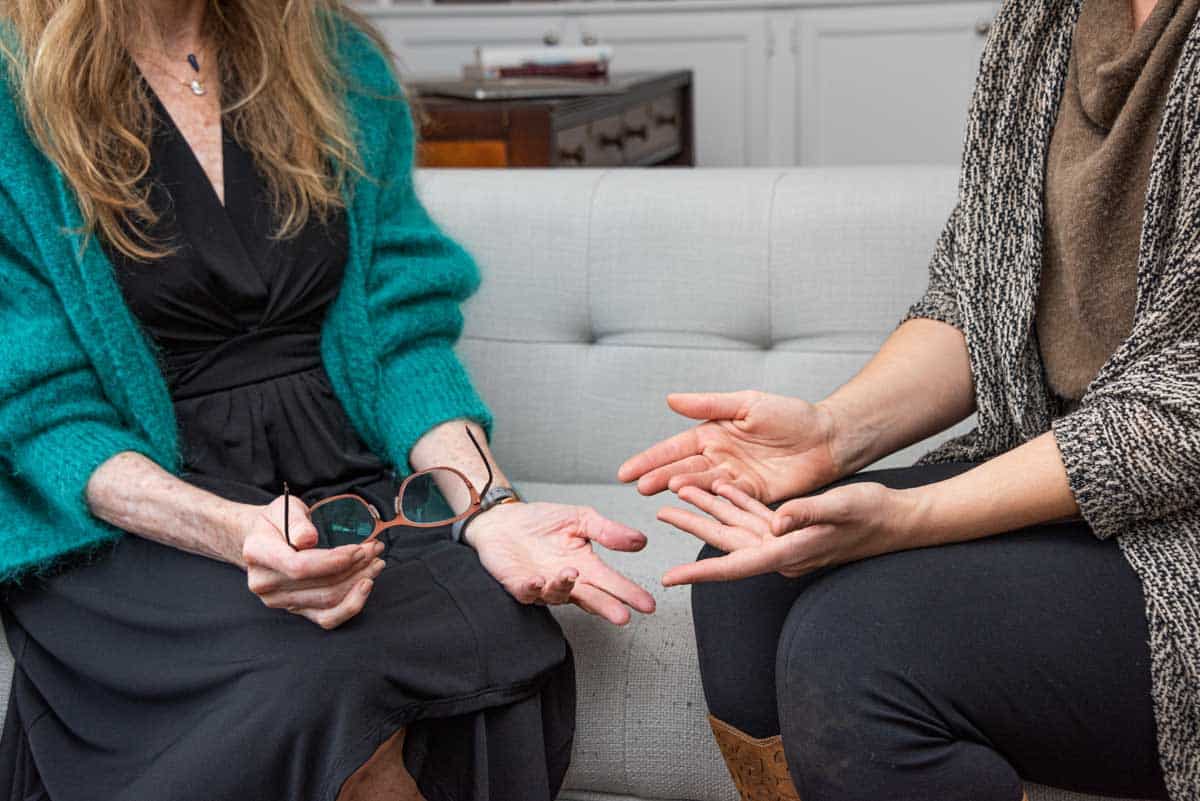
- Photo of you doing a mock therapy session in your office
- Photo of you doing a mock therapy session on video (happy to be the person on the video if you need)
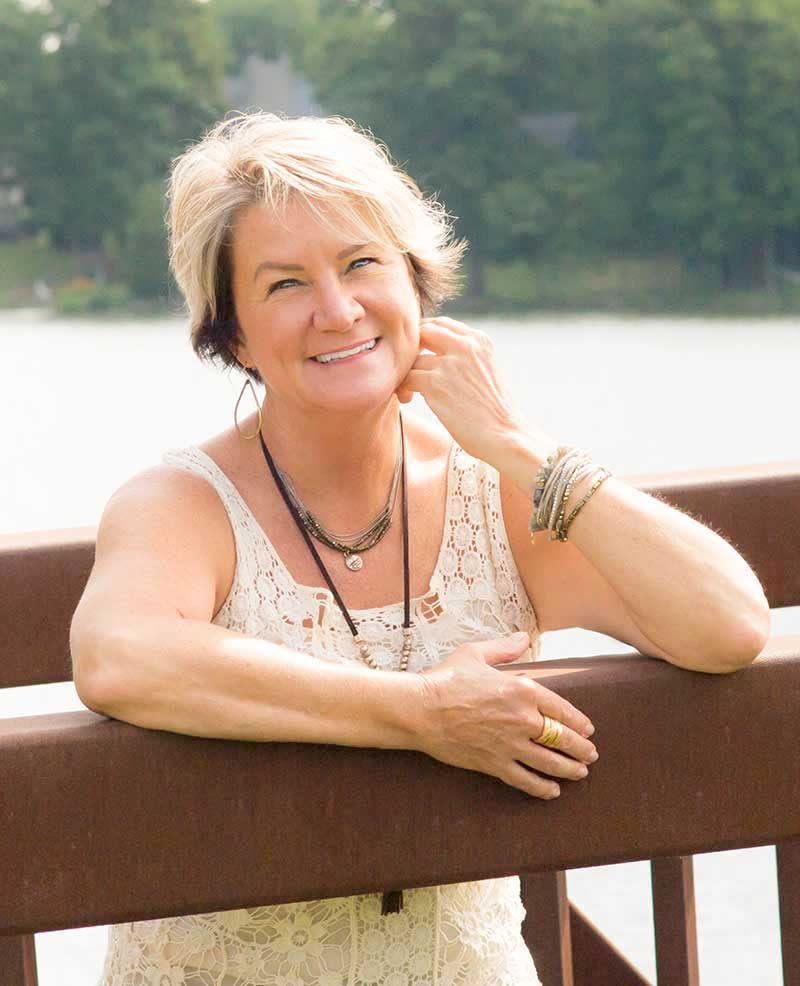
- Lifestyle photos of you outside.
- Photo of you reading a book.
- Office photos of the details of your office.
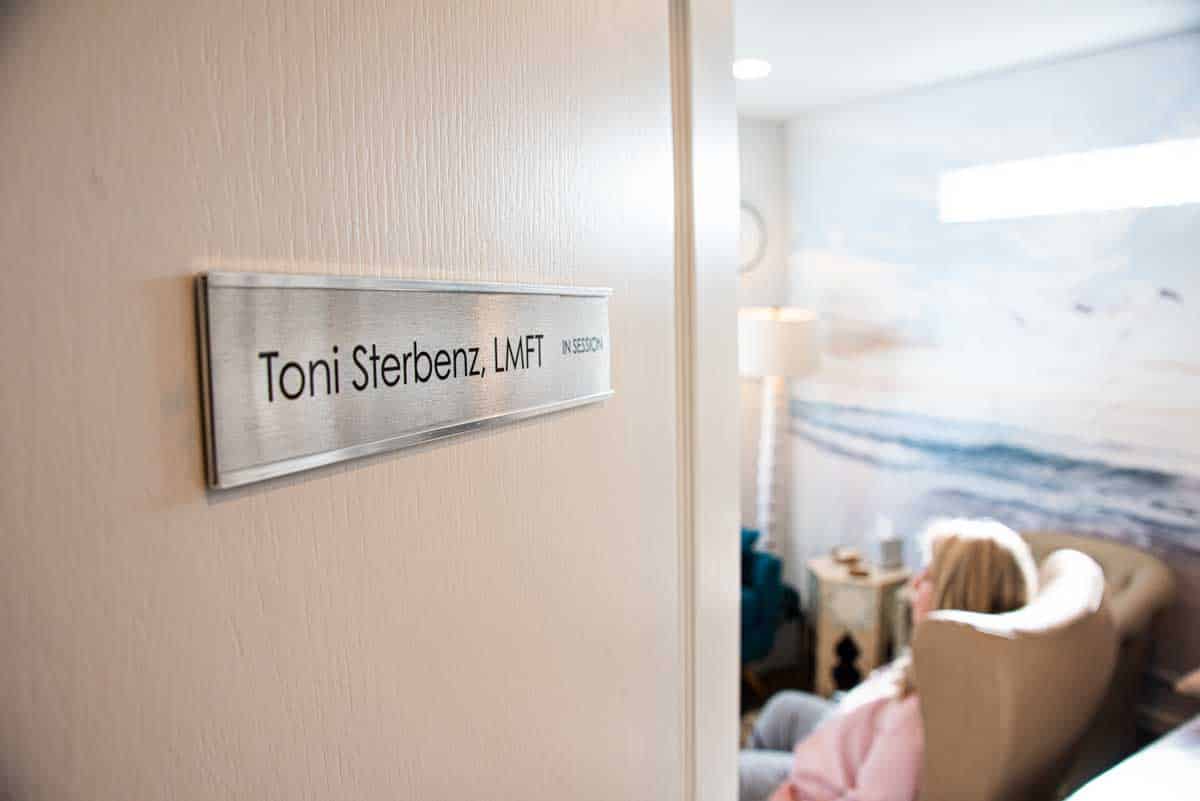
- Do you have a nameplate?
- Traditional portraits
- Photos of you pointing (to use for future videos/blog post covers, assuming it feels in alignment – see attachments for ideas)
- Photos with you on one half of the image and a neutral background or negative space on the other side so we can put text over it.
- A healthy selection of portrait orientation photos, as they tend to be better for balancing out longer sections of text.
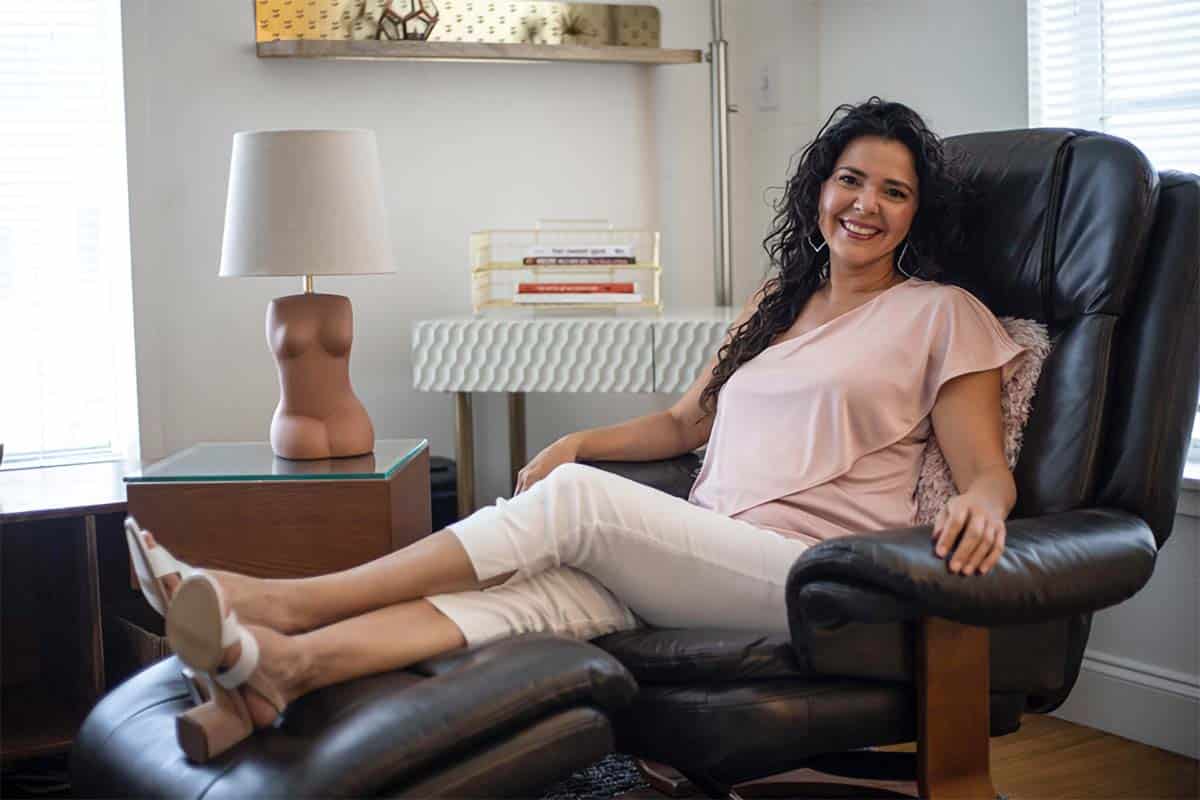
The Importance of a Therapist Office Photoshoot
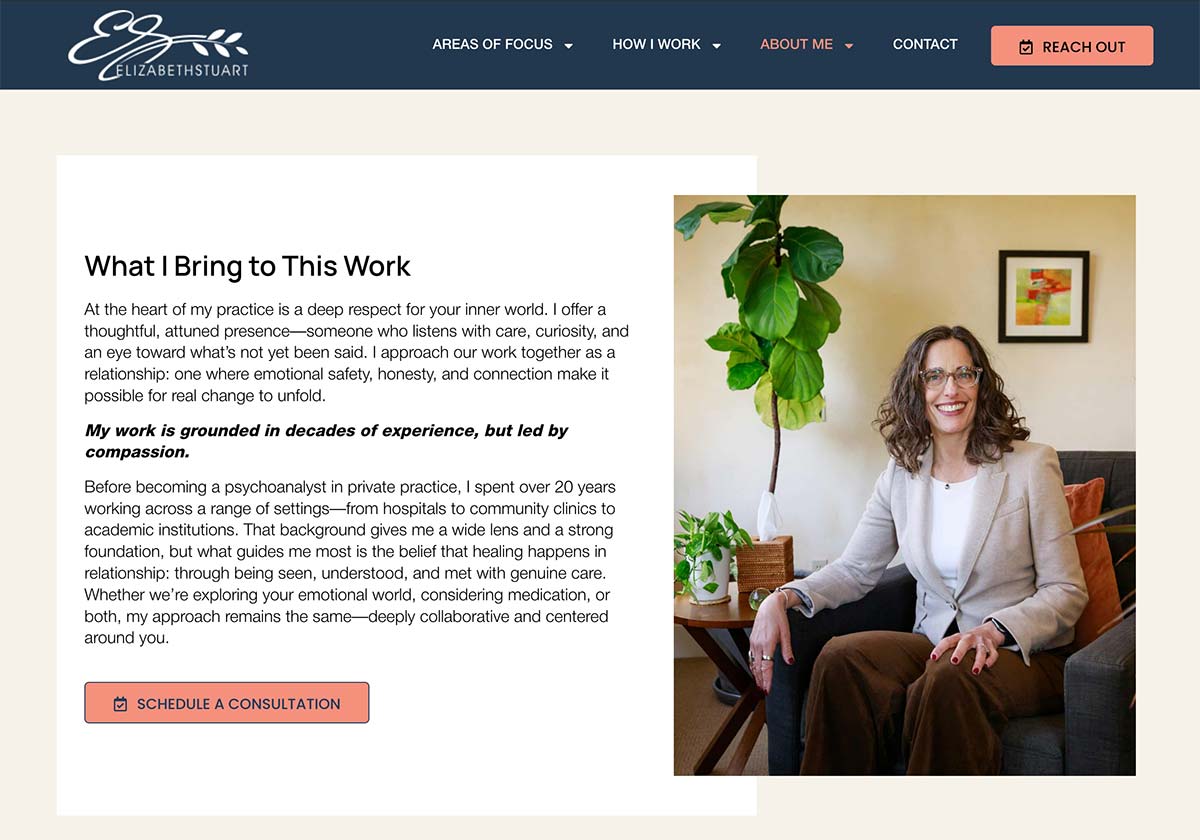
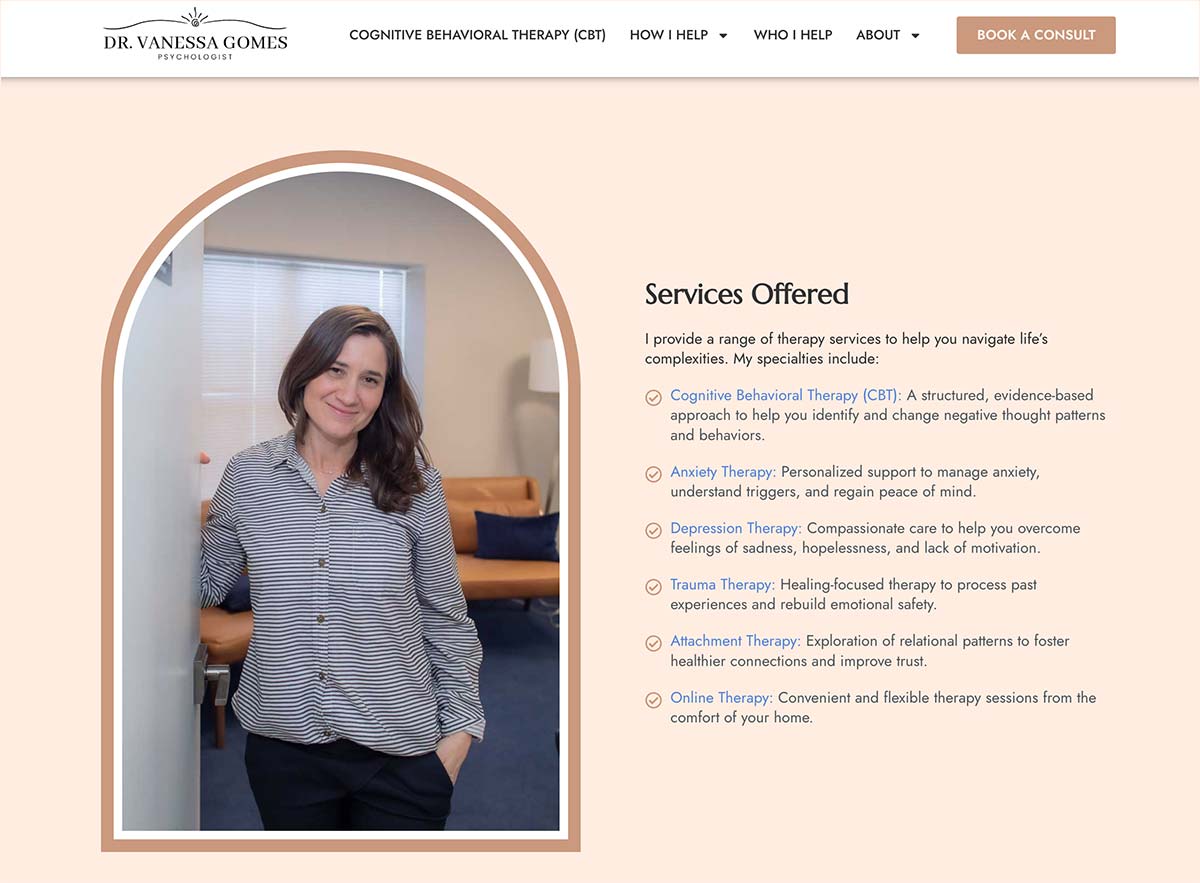
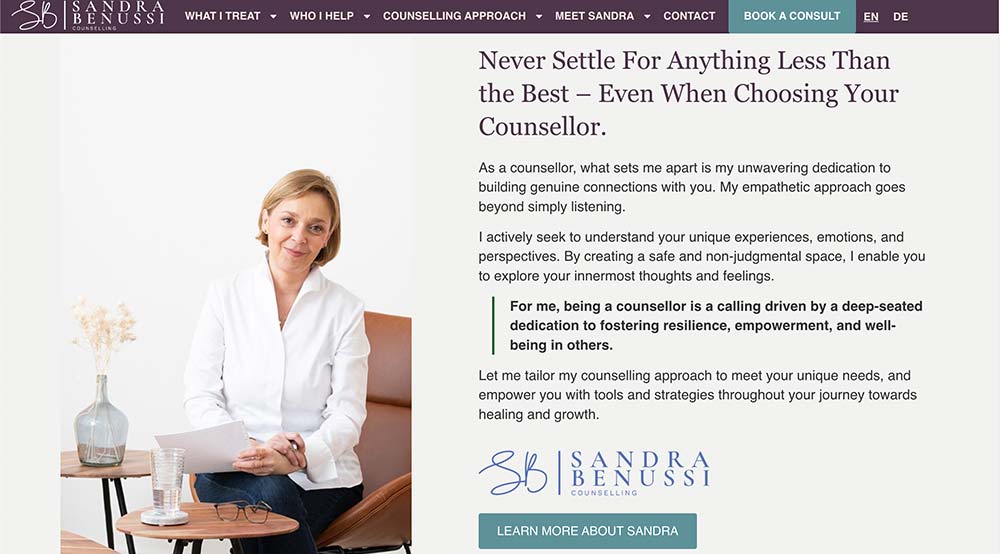
Photos of you in your office go beyond traditional therapist headshots by adding depth and context to your online presence. While therapist headshots are okay for a polished first impression, photos of you in your office tell a complete story about who you are as a therapist, and what potential clients can expect.
They show your workspace, reflect your personality, and create a sense of comfort and connection. Plus, they can normalize an often intimidating environment, demystifying the process for those who feel nervous about starting therapy.
Ideas for Your Therapist Office Photoshoot
- Sit comfortably in the chair where you meet with clients, capturing a warm and professional presence.
- Welcome someone at your front door to show how inviting your practice feels.
- Work at your desk—writing notes, typing, or reading—to convey authenticity and a sense of purpose.
- Highlight office details, like cozy chairs, books, plants, or personal decor that reflects your style.
- Include your nameplate, if you have one, as a small but professional touch.
- Hold a notebook or pen if you typically take notes during sessions.
- Place tissues or water nearby to create a relatable, real-world feel.
- Avoid overly staged or formal postures—relaxed authenticity is key.
Plan a Mock Therapy Sessions
Mock therapy sessions are an excellent way to visually represent what it’s like to work with you as a therapist. They add depth to your therapist website design by giving potential clients a glimpse into the environment and style of care you provide.
I suggest asking a colleague, friend, or family member to pose as the client. Choose someone you feel comfortable with and who understands the importance of conveying the right tone.
In-Person Sessions
- Stage the session as naturally as possible. Use common seating arrangements that you and your clients actually sit in during sessions.
- Take creative liberties with furniture placement. No one will notice that your couch is in a different place from that one photo on your website.
- Pretend like it’s a real session. It sometimes helps to do a mock session. Or, to at least have a conversation with the person in front of you. That way, you can listen attentively, naturally smile, and use hand gestures.
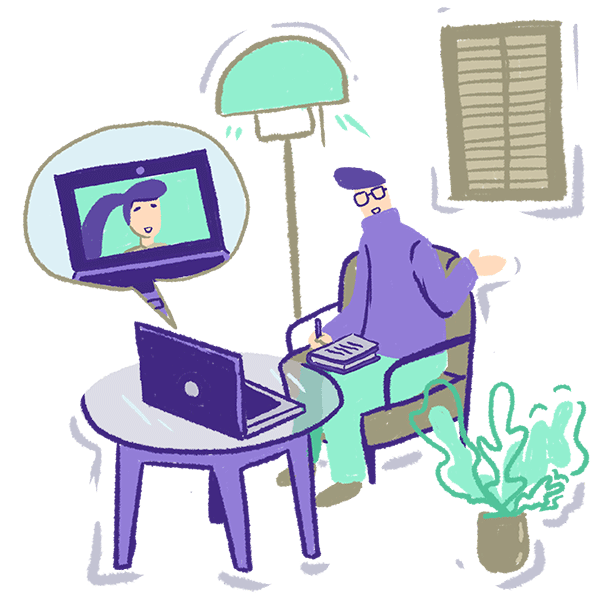
Virtual Sessions:
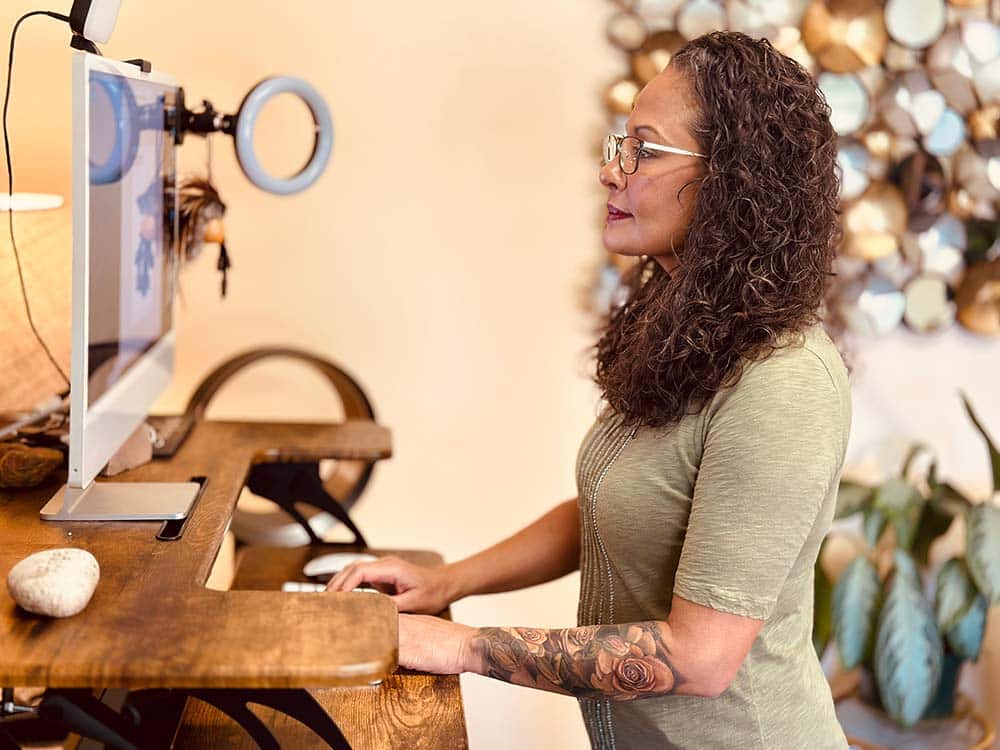
- Show what a session looks like from your perspective. Position yourself and your screen in the photo.
- Experiment with different angles. Try a few shots from the front or side of your desk where you can’t see your screen. Also, get a wide-angle photo of your entire office with as much detail in the photo as possible.
- Consciously choose your knick-knacks. Our “stuff” tells a story – what do you want yours to say?
- Ask someone to be on the screen. Otherwise, it just looks fake.
Details Capture the Soul of Your Office
Your office is more than just a workspace. It reflects your personality, your approach to therapy, and the welcoming environment you’ve created for your clients. While wide shots and portraits are important, the small details matter just as much. They help potential clients feel a sense of familiarity and comfort before they even walk through the door.
Think about the everyday items that make your space feel lived-in and authentic. A cozy couch, a favorite mug on your desk, a bookshelf filled with meaningful titles. These elements tell a quiet story about who you are and how you show up in your work. Here are a few ideas:
- Bookshelves: Highlight your favorite titles, therapy tools, or even a quirky bookend that shows off your personality.
- Diplomas and Certifications: These small touches can build trust and credibility without saying a word.
- Comfort Items: Tissues, throw blankets, mugs, or water glasses—things that make your office feel like a second home.
- Artwork and Decor: Whether it’s calming landscapes, affirmations, or bold modern art, the visuals on your wall tell a story.
- Plants and Natural Elements: A pop of greenery adds life, warmth, and a touch of serenity to any photo.
- Lighting: Lamps, candles, or windows that bathe the space in soft light can evoke a feeling of calm and safety.
- Therapeutic Tools: Sand trays, fidgets, whiteboards, or anything else you use in session can give a glimpse into your approach.
- Personal Touches: Statues, souvenirs, or sentimental objects that represent your journey as a therapist.
You can use these photos on any page and any section of your website. Instead of cheesy stock photography, put a picture of your office. Or, consider adding a photo gallery to your contact or about page. Think of it as a behind-the-scenes peek at your therapy office. At Goodman Creatives, we do this on pretty much every about page we design and it really adds something special to the site. Check out our web design portfolio here.

Lifestyle Shots Bring Your Personal Brand to Life
Lifestyle photos are a powerful way to humanize your practice and create a personal connection with your dream clients. The goal is to show the authentic, relatable person behind the therapy office. By showcasing aspects of your life and personality, you can build trust and make it easier for clients to see themselves working with you.
Remember, the purpose of lifestyle photos is to connect with your dream client. The more intentional you are about choosing locations and activities that reflect both your personality and theirs, the stronger that connection will be. These images will make your website and branding feel authentic, memorable, and far more engaging than generic stock photography ever could.
Highlight Your Favorite Places
Think about local spots you love that also align with your dream client’s preferences. Where do you feel most yourself? Where might your ideal client go to recharge or find peace?
- Nature Scenes: Parks, hiking trails, beaches, or botanical gardens. These settings evoke tranquility and growth.
- Urban Backdrops: Quaint neighborhoods, colorful murals, or local landmarks that reflect vibrancy and connection.
- Community Favorites: Your favorite coffee shop, bookstore, or farmers’ market. These locations can convey a sense of comfort and familiarity.
Share Hobbies and Interests
Showcase the activities you enjoy outside of work to make yourself relatable and approachable. This helps humanize your brand and provides a glimpse of the “real you.”
- Creative Pursuits: Painting, crafting, or playing an instrument.
- Mindful Activities: Journaling, meditating, or practicing yoga.
- Outdoor Adventures: Walking, gardening, or enjoying a picnic.
Evoke Warmth with Natural Light
Time of day plays a significant role in creating stunning lifestyle photos. Use light to your advantage for beautiful, timeless images.
- Golden Hour: Schedule your session during the hour after sunrise or before sunset for soft, warm lighting.
- Sunlit Streets: Capture movement, like walking down the street or pausing to admire the scenery.
- Silhouettes: Play with light and shadows for a striking, artistic look.
Create Relatable Everyday Moments
Photos of simple, everyday activities can foster a sense of familiarity and connection.
- Reading Nooks: Cozy up with a book in a serene environment, highlighting your commitment to learning and growth.
- At Home: Sitting by a window, enjoying a cup of tea, or relaxing in your favorite chair.
- Community Engagement: Volunteering, attending an event, or interacting naturally in your community.
Focus on Places Your Dream Client Loves
Consider locations that reflect the life your dream client is striving for or already enjoys. By placing yourself in these settings, you create a sense of alignment and relatability.
- Family-Friendly Spaces: If your focus is on families, capture moments at a playground or community space.
- Wellness Spaces: Gyms, yoga studios, or wellness centers can align with a health-conscious clientele.
- Trendy Spots: Connect with local clients by showing yourself at local hotspots (or hidden gems).
Plan a Shot List With Your Web Designer
It’s essential to consider how your counseling photo session images will function on your website. Beyond showcasing your personality and practice, your photos should support the design and usability of the site.
Before scheduling your shoot, connect with your web designer to ensure you’re capturing exactly what your website needs. Your designer can provide insight into the layout, image dimensions, and types of photos that will work best for your site.
For example, they might recommend specific poses, orientations (vertical or horizontal), or images with negative space to accommodate text overlays. Knowing this in advance ensures your photos complement the design and enhance the overall flow of your site. Here are some specific considerations:
Vertical Images for Text-Heavy Sections
Vertical (aka, portrait-oriented – aka, tall) photos are perfect for balancing out sections of your website that have a lot of text. They create visual interest and break up the flow, preventing the page from feeling overwhelming.
Horizontal Images for Backgrounds and Hero Sections
Horizontal (landscape-oriented) photos work beautifully as section backgrounds or hero images. They create a sense of space and are visually striking at larger sizes. Consider:
- Capturing images of yourself sitting in your office or outdoors with plenty of room around you for cropping and scaling.
- Using horizontal shots for the top of your homepage to create an immediate impression of warmth and professionalism.
Negative Space for Overlaying Text
Photos with neutral or blank areas — called negative space — are invaluable for web design. These allow your designer to overlay text without competing with the image. Tips for creating negative space:
- Pose to one side of the frame, leaving the other side open and uncluttered.
- Use simple backdrops, such as blank walls, soft skies, or blurred greenery, to provide a clean area for text.
- Think about therapist marketing needs like blog headers, social media banners, and email graphics when planning these shots.
Flexible Images for Responsive Design
Your website will likely be viewed on screens of all sizes — from mobile phones to widescreen desktops. Having photos that can work in both vertical and horizontal formats ensures flexibility and adaptability for responsive design.
- Capture photos with wider framing so they can be cropped either vertically or horizontally as needed.
- Keep your central subject (you!) in the middle of the frame to maintain focus, regardless of how the image is cropped.
Dynamic Poses to Draw the Eye for Visual Interest
In addition to traditional seated or standing poses, consider more dynamic, interactive gestures to add life to your images. That way, if the image is placed next to text, the viewer’s eyes will naturally draw attention to your words.
- Pointing or Gesturing: Great for blog posts, social media, or videos where you’re emphasizing a topic or idea.
- Looking Off-Frame: Create a sense of openness and curiosity by looking toward the edge of the frame.
- Interacting with Objects: Holding a book, writing in a notebook, or sipping tea adds a personal touch.
Don’t Just Focus on Traditional Therapist Headshots
What type of photo makes people stop scrolling on Psychology Today? It’s not a stuffy therapist headshot of someone in a suit or business shirt. It’s a smile. A colorful backdrop. A photo that is alive and relatable. That’s why I personally don’t recommend therapist headshots for your website or marketing.
That said, professional headshots do come in handy sometimes — especially in situations that call for a more formal presentation, like speaking engagements or business-related profiles. Or, if your dream client expects to see a headshot. In that case, you should 100% include one (or more) on your website.
How Much Should a Therapist Branding Photo Session Cost?
Branding photography is an investment in the identity of your practice. Costs vary based on your location, the photographer’s experience, the duration of the session, and the services included. Some photographers charge by the hour, while others offer flat-rate packages. Many will only provide you with a limited number of edited photos, with additional images available for an extra fee.
When possible, I recommend working with a photographer who offers a single flat rate and provides you with access to all the photos from your session. That way, you’re not stuck picking just a few favorites or paying extra to get more images later.
Budget ($300 – $800)
This range is a complete crapshoot. If someone is charging this amount, you can assume one of two things … either they have no idea what they are doing. Or, they are incredibly talented but probably struggle with imposter syndrome and have yet to embrace their worth. I say this from experience, as I charged $600 for years while providing 100+ amazing photos to my clients.
Here are a few risks you run at this price point:
- Sessions may feel less structured, and you might find yourself directing more than you’d like.
- Unflattering angles, awkward composition, grainy images, and overly-edited photos are common.
- Many photographers at this level do not use professional lighting or flash.
Entry-Mid Level ($800 – $1,200)
Photographers in this range usually have some experience and a more established portfolio. You’ll likely get a basic mix of traditional portraits and lifestyle shots. Expect a bit more structure and direction, though you may still need to take some initiative during the session. Some photographers may limit how many final edited images you receive unless you pay extra.
Here’s what you can expect at this price point:
- Some posing guidance, though it may be inconsistent or minimal
- A mix of portrait and lifestyle photos, but not always strategically planned
- Decent image quality, though lighting and editing may still be hit or miss
- A more transactional feel, with less focus on pre-session planning or brand alignment
- Potential image limits unless you purchase extra photos individually
Mid-Range ($1,200 – $2,500)
Photographers in this range are likely highly experienced and genuinely good at what they do. They know how to make you feel at ease, guide you through flattering poses, and capture images that look and feel like you. These sessions typically offer a thoughtful mix of traditional portraits and lifestyle shots, with enough structure to support you throughout the process.
What you’ll likely experience in this range:
- Confident direction on how to pose, where to look, and how to express yourself naturally
- A well-organized shoot with pre-session planning that aligns with your brand and goals
- High-quality lighting, professional gear, and consistent editing
- A variety of looks and settings to give you flexibility across your website and marketing materials
- Access to a large selection of final images, often with all files included in a flat rate
Premium ($2,500+)
At this level, you’re hiring someone at the top of their field. There’s a solid chance they’ve worked with celebrities, high-end entrepreneurs, or luxury brands. These photographers are elite, in demand, and deliver an experience that’s curated down to the smallest detail. While impressive, this level of service is more than most therapists will ever need. But if you want a white-glove experience and don’t mind paying for it, it’s a safe bet that the results will be exceptional.
What sets this tier apart:
- Industry-level production quality
- A completely hands-off experience where every detail is handled for you
- Exclusive-level polish with styling, creative teams, and full-day shoots
Tips For Working With a Photographer
Selecting a photographer who understands the unique needs of therapists is crucial. You want someone who understands the balance between professional and approachable. I recommend looking for photographers with experience in branding or small business photography since they’re often skilled at capturing personality in addition to professionalism.
Do Your Research
- Search Local and Specific — Use search terms like “branding photographer near me” or “small business photography [your city].”
- Ask for Recommendations — Fellow therapists or local small business owners can often recommend someone.
- Review Portfolios — Look for natural lighting, warmth, and an approachable feel. Avoid photographers whose work feels overly stiff or formal unless that matches your brand.
- Have a Conversation — Talk to the photographer about what you want to convey. Discuss your practice’s vibe and your goals for the session. A good photographer will listen and guide you.
- Futureproofing — Once your session is complete, think about the best way to share images with clients.
Consider Whether They Offer Video
In today’s marketing landscape, video is a powerful complement to your photos. Ask if your photographer also shoots short videos . Even a few seconds of high-quality footage can go a long way.
Whether it’s an intro video for your website, a Psychology Today video, or social media content, video is a key part of creating a personal connection with potential clients. If your photographer can do both, it’s a huge bonus.
Embrace the Discomfort
Here’s the thing: almost everyone feels awkward in front of a camera. We all worry about “making goofy faces” or “not liking how we look.” A good photographer understands this and will take whatever steps are needed to make you feel comfortable and get photos you love.
Remember, photos are meant to highlight you—not a flawless version of yourself, but the warm, professional, and relatable therapist clients are looking for. Here are a few things to discuss with the photographer you hire for your counseling photo session.
- Talk About Your Angles: If you know what you like (or don’t like) about how you look on camera, let your photographer know. This isn’t vain—it’s helpful!
- Share Your Concerns: Whether it’s about certain expressions, features, or poses, being upfront gives your photographer the information they need to help you feel confident.
- Trust the Process: Most people don’t love every photo of themselves, but I promise there will be some you’ll adore.
Plan Your Wardrobe
I recommend bringing 2-3 outfits in colors that align with your website’s palette. Neutral or muted tones often work best since they feel calming and professional. Avoid busy patterns or logos, but feel free to add subtle textures, like a scarf or a layered sweater, to create interest.
Enjoy the Process
Hopefully, this guide has given you a solid starting point and the confidence to create photos that feel authentic and resonate with your dream clients. Above all else, remember to have fun with the process. The more relaxed you are, the better your photos will turn out. Trust your photographer, be open to their suggestions, and don’t be afraid to take breaks if you need to reset and refocus.
Now it’s your turn—go out and make it happen! Plan your session, find the right photographer, and enjoy capturing the heart of your practice. And if you need help, want to brainstorm ideas, or just need a sounding board, I’m always here to support you. You’ve got this!


